Kapitel 5. X11
Die Basisinstallation von Debian GNU/Linux sieht keine grafische Benutzeroberfläche vor. Aus Sicht des Einsteigers macht das die Installation nicht gerade leichter, da heute jeder mit der Handhabung einer Maus vertraut ist. Wie Sie aber gesehen haben, stellt eine textbasierte Installationsroutine auch kein wirkliches Hindernis dar. Für eine textbasierte Installation sprechen zwei Gründe: zum einen wird nicht auf allen Systemen eine grafische Benutzeroberfläche benötigt (zum Beispiel Server), und zweitens sind nicht alle von Debian GNU/Linux unterstützten Architekturen (z. B. m68k) von der Hardwareausstattung her in der Lage, eine sinnvolle grafische Installation durchzuführen.
Debian GNU/Linux verwendet, wie alle anderen Linux-Distributionen auch, das X-Window-System zur Darstellung der grafischen Benutzeroberfläche. Die Treiber für die verschiedenen Grafikkarten werden vom XFree86-Team entwickelt (http://www.xfree86.org). XFree86 ist eine freie Implementation des X-Window-Systems, welches auf allen Unix-ähnlichen Betriebssystemen läuft. Die „86“ im Namen läßt vermuten, daß diese Software nur auf 3/4/586er-Prozessoren lauffähig ist. Ursprünglich wurde XFree86 auch dafür entwickelt, mittlerweile ist XFree86 aber auch auf anderen Prozessor-Architekturen lauffähig. Somit müssen Debian GNU/Linux-Benutzer auf keiner Architektur auf den Luxus einer grafischen Oberfläche verzichten.
X11 selbst entstand im Jahre 1986 als Ergebnis der beiden Vorgängerprojekte V und W. Im Laufe der Entwicklung wurden die grundlegenden Protokolle weiterentwickelt, blieben aber immer zu den älteren Versionen kompatibel. 1992 erschien dann die erste Version von X11 für PCs. Das XFree86-Projekt selbst startete mit einem Referenzserver für die PC-Plattform, welcher von Thomas Röll (heute Xi Graphics) geschrieben wurde, welcher dem Projekt zur Verfügung gestellt wurde.
Ungeachtet dessen ist es natürlich ohne weiteres möglich, auch mit Debian GNU/Linux in den Genuß einer grafischen Benutzeroberfläche zu kommen. Um eine Grafikkarte zu benutzen benötigt man, wie bei anderen Betriebssystemen auch, einen Treiber. Diese Treiber stehen in Form sogenannter „X-Server“ zur Verfügung. Es werden im folgenden die Installation dieses Servers und einige ausgewählte Anwendungen vorgestellt.
Die aktuelle Version 4 von XFree86 ist ab der Version „woody“, also Debian GNU/Linux 3.0, in die Distribution integriert worden. Die ältere Version 3.3.6 ist jedoch weiterhin verfügbar, so das bei Problemen mit den Treibern aus XFree 4 jederzeit auf die Version 3 zurückgegriffen werden kann.
Installation von XFree86 3.3.x
Wie bei allen neuen Treibern, die man in ein Debian GNU/Linux-System einbindet, ist es vorteilhaft, möglichst genaue Informationen über die verwendete Hardware zu haben. Bei der Vielfalt der auf dem Markt angebotenen Grafikkarten kann es da schon manchmal etwas schwierig sein, herauszufinden, welches Modell man in seinem Rechner hat. Gerade bei Komplettgeräten hat man nicht unbedingt die genaue Modellbezeichnung zur Hand. Schwierig wird es auch bei Motherboards mit einem integrierten Grafikchip. Eine Übersicht der unterstützten Chipsets für die zur Zeit aktuelle Version 3.3.6 von XFree86 finden Sie unter der URL: http://www.xfree86.org/3.3.6/README3.html#3 . Bitte beachten Sie: Dies ist eine Liste der Grafikchips auf den jeweiligen Karten, Sie finden keine Namen der Kartenhersteller. Wenn größere Probleme bei der Installation der Grafikkarte auftauchen, müssen Sie im schlimmsten Fall Ihren Rechner öffnen und einen Blick auf die Grafikkarte werfen. Aber meist ist das nicht notwendig. Das Programm xviddetect erkennt die meisten Grafikkarten und gibt auch gleich den Namen des passenden X-Servers aus:
fr@linux:~$ xviddetect The XFree86 server for Matrox Graphics, Inc. MGA G400 AGP is svga |
Wenn Sie lediglich auf den Namen des benötigten X-Servers Wert legen, können Sie xviddetect mit der Option -q aufrufen.
Hier noch ein anderes Beispiel, diesmal ist xviddetect allerdings nicht in der Lage die Karte zu erkennen:
fr@linux:~$ xviddetect Sorry, I wasn't able to determine a driver for your video card. This script only detects PCI and some SBUS devices. If you know, or figure out, which X driver to use, please submit a wishlist bug against this package with the appropriate info. Please see http://bugs.debian.org/ for information about submitting bugs. I will now display a list of PCI devices I found on your computer. Please send the line associated with your video device if you do find a driver. 80867190|i386|Intel Corporation|440BX/ZX - 82443BX/ZX Host bridge 80867191|i386|Intel Corporation|440BX/ZX - 82443BX/ZX AGP bridge 80867110|i386|Intel Corporation|82371AB PIIX4 ISA 80867111|i386|Intel Corporation|82371AB PIIX4 IDE 80867112|i386|Intel Corporation|82371AB PIIX4 USB 80867113|i386|Intel Corporation|82371AB PIIX4 ACPI 10222020|i386|Advanced Micro Devices [AMD]|53c974 [PCscsi] 109e0350|i386|Brooktree Corporation|Bt848 TV with DMA push 12741371|i386|Ensoniq|ES1371 [AudioPCI-97] 10b79050|i386|3Com Corporation|3c905 100BaseTX [Boomerang] 11030004|i386|unknown manufacturer|unknown model 11030004|i386|unknown manufacturer|unknown model 105d5348|i386|Number 9 Computer Company|Revolution 4 |
Wenn Sie einen genaueren Blick auf die Liste der gefundenen PCI-Geräte werfen, werden Sie sicher Ihre Grafikkarte darunter finden. In diesem Fall ist es der Eintrag in der letzten Zeile. Sie können mit diesen Angaben die entsprechende Karte und den dazugehörigen X-Server bestimmen. Eine weitere Hilfe ist SuperProbe, doch dazu gleich mehr.
Für die Konfiguration von XFree86 stehen bei Debian GNU/Linux drei Programme zur Auswahl, zwei Versionen mit textbasierter und eine Version mit grafischer Oberfläche. Installieren Sie zunächst die benötigten Pakete. Ein sinnvoller Start ist das Paket xf86setup, in diesem befinden sich die Konfigurationsprogramme xf86config und XF86Setup. Das Paket xf86setup benötigt einige weitere Pakete, wie immer werden Sie während der Installation mit dselect oder apt darüber informiert, welche weiteren Pakete benötigt werden. Das dritte Konfigurationsprogramm, anXious, finden Sie im Paket xviddetect.
Folgende Pakete, die zum X-Window-System gehören, werden benötigt: xbase-clients, xfonts-100dpi oder xfonts-75dpi, xfonts-base, xserver-common, xserver-vga16 oder ein anderer xserver, tcl8.0, tk8.0, xlib6g.
Während der Installation dieser Pakete werden Sie gefragt, ob Sie den gerade installierten X-Server als „default“ einstellen wollen und ob Sie eine Konfigurationsdatei für XFree86 erzeugen wollen. Wenn Sie dies tun wollen, wird das textbasierte Installationsprogramm xf86config gestartet. Es schadet nicht diesen Schritt zu überspringen, Sie können später xf86config immer noch von Hand starten.
Versuchen Sie zunächst, einige nähere Informationen zu Ihrer Grafikkarte herauszubekommen. Im Paket xf86setup befindet sich das sehr nützliche Programm SuperProbe (beachten Sie die Groß- und Kleinschreibung!). Führen Sie dieses Programm einmal als Superuser aus, erhalten Sie beispielsweise folgende Informationen:
SuperProbe Version 2.20 (17 June 1999) (c) Copyright 1993,1994 by David Wexelblat <dwex@xfree86.org> (c) Copyright 1994-1998 by The XFree86 Project, Inc This work is derived from the 'vgadoc2.zip' and 'vgadoc3.zip' documentation packages produced by Finn Thoegersen, and released with all appropriate permissions having been obtained. Additional information obtained from 'Programmer's Guide to the EGA and VGA, 2nd ed', by Richard Ferraro, and from manufacturer's data books Bug reports are welcome, and should be sent to XFree86@XFree86.org. In particular, reports of chipsets that this program fails to correctly detect are appreciated. Before submitting a report, please make sure that you have the latest version of SuperProbe (see http://www.xfree86.org/FAQ). First video: Super-VGA Chipset: Matrox (chipset unknown) (PCI Probed) Signature data: 8 (please report) RAMDAC: Generic 8-bit pseudo-color DAC (with 6-bit wide lookup tables (or in 6-bit mode)) |
Entscheidend sind die letzten Zeilen. Das Testprogramm hat in diesem Beispiel eine Grafikkarte der Firma Matrox gefunden. Diese wird von XFree86-Server „SVGA“ unterstützt.
Eine weitere Möglichkeit – neben dem Öffnen des Rechners – Informationen über die Grafikkarte zu bekommen, besteht darin, die Ausgabe des Kommandos cat /proc/pci nach Informationen zu durchsuchen. Hier ein Ausschnitt der Ausgabe des Befehls mit den Informationen zu der gleichen Karte:
  Bus  1, device   0, function  0:
  VGA compatible controller: Matrox Unknown device (rev 3).
    Vendor id=102b. Device id=525.
    Medium devsel.  Fast back-to-back capable.
     Master Capable.  Latency=32.  Min Gnt=16.Max Lat=32.
    Prefetchable 32 bit memory at 0xe8000000 [0xe8000008].
    Non-prefetchable 32 bit memory at 0xe4000000 [0xe4000000].
Non-prefetchable 32 bit memory at 0xe5000000 [0xe5000000]. |
Auch hier ist wieder die Information, daß es sich um eine Matrox-Karte handelt, zu finden. Alternativ läßt sich auch das Programm lspci aus dem Paket pciutils einsetzen, dieses bereitet die Ausgabe etwas ansprechender auf.
Sollten Sie mit diesen Methoden keine ausreichenden Informationen über die im Rechner eingebaute Grafikkarte bekommen, können Sie immer noch probieren, das X-Window-System mit dem SVGA-Treiber zum Laufen zu bekommen. Dieser unterstützt die gebräuchlichsten Karten. Ansonsten hilft in vielen Fällen auch ein Blick in den Rechner. Meist sind die benötigten Informationen auf dem größten Chip zu finden, oder aber die Platine wurde vom Hersteller mit nützlichen Informationen bedruckt. Wer seinen Rechner aber individuell zusammengestellt hat, wird wissen, welche Karte im Rechner steckt.
Weiterhin ist es wichtig festzustellen, an welchem Anschluß die Maus steckt und um was für ein Maus-Modell es sich handelt. Wenn Sie das Programm gpm bereits installiert haben, sind Ihnen diese Angaben aber vertraut.
Doch nun zu den eigentlichen Konfigurationsprogrammen.
XF86Setup
Einen ersten Versuch sollten Sie mit XF86Setup starten.
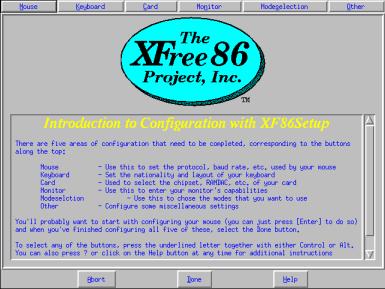
XF86Setup erlaubt die Konfiguration des X-Window-Systems über eine grafische Oberfläche. Hierzu wird bereits ein X-Server gestartet (VGA16), der auf allen Grafikkarten in einer minimalen Auflösung lauffähig ist. Nach dem Start können Sie, falls die Maus noch nicht funktioniert, mit den Tasten TAB, SPACE und RETURN durch die Menüs wandern und die gewünschten Einstellungen vornehmen. Am besten fangen Sie mit den Einstellungen zur Maus an, Sie haben es dann einfacher, den Rest zu konfigurieren.
Wenn Sie den Menüpunkt Mouse wählen, bekommen Sie zuerst eine kurze Hilfe angezeigt. Sie finden hier u. a. Angaben zu den üblichen Gerätedateien (Devices, z.B. /dev/psaux oder /dev/ttyS0), an denen die Maus angeschlossen sein könnte. Verlassen Sie die Hilfe mit der RETURN
Im folgenden können Sie alle Einstellungen für die Maus vornehmen. Die beiden wichtigsten Parameter sind das sogenannte „Mouse Protocol“ und das „Mouse Device“. Sollte die Maus bereits funktionieren, sind hier im allgemeinen keine Einstellungen nötig.
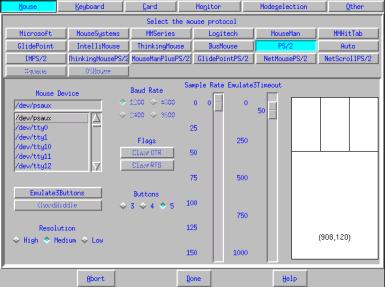
Im hier gezeigten Beispiel wird eine PS/2-Maus verwendet. Wählen Sie also das gewünschte Protokoll der Maus (den Maus-Typ) und das dazugehörige Device aus. Wenn es Ihnen zu mühselig ist, aus der langen Liste das passende Device auswählen, können Sie das Device auch von Hand eingeben. Haben Sie alle Einstellungen vorgenommen, so aktivieren Sie die Schaltfläche Apply unten rechts auf dem Bildschirm. Die bisher vorgenommenen Einstellungen für die Maus werden damit übernommen und wenn alles korrekt angegeben wurde, können Sie alle weiteren Einstellungen per Maus vornehmen.
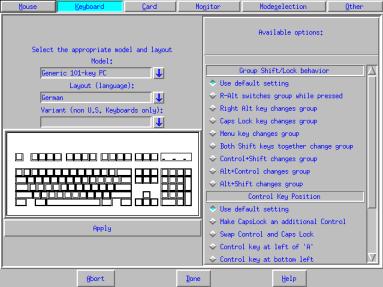
Zur Einstellung der Tastatur gibt es nicht viel zu sagen, wählen Sie die passende Sprache aus.
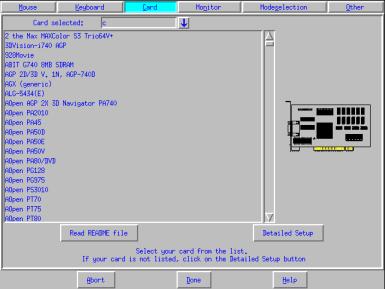
Stellen Sie nun unter Card den Typ Ihrer Grafikkarte ein. Sie können den Hersteller und das Modell aus einer sehr umfangreichen Liste auswählen. Bei einigen Karten können genauere Einstellungen über die Schaltfläche „Detailed Setup“ gemacht werden, beispielsweise wenn der Speicherausbau der Karte nicht korrekt erkannt wird. Im allgemeinen sind dort aber keine Einstellungen nötig.
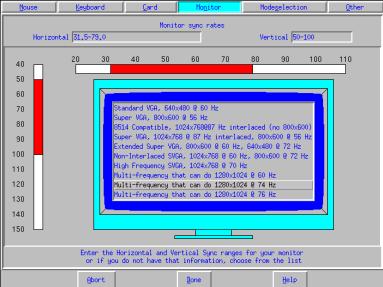
Auch die Einstellungen für den Monitor sind recht einfach vorzunehmen, wählen Sie einen passenden Monitor aus der Liste aus, von dem Sie glauben, daß er Ihrem Modell am nächsten kommt. Wenn Sie sich nicht sicher sind, wählen Sie lieber erst mal einen kleineren, leistungsschwächeren Monitor aus, Sie können sonst Ihren Monitor beschädigen. Wenn Sie in Ihrem Handbuch zum Monitor die technischen Daten für die horizontalen und vertikalen Frequenzen finden können, können Sie diese auch unter „Monitor sync rates“ eintragen, so nutzen Sie die Möglichkeiten Ihres Gerätes optimal.
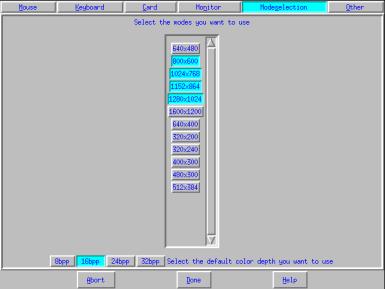
Unter „modeselection“ stellen Sie die gewünschten Auflösungen und die Anzahl der gewünschten Farben ein. Sie können mehrere Auflösungen vorauswählen, zwischen denen Sie später mit STRG + ALT + + oder STRG + ALT + - (auf dem Zehnerblock) umschalten können. Dies funktioniert natürlich im laufenden Betrieb, ohne Neustart des Systems. Wenn Sie nur über eine sehr einfache Grafikkarte mit sehr wenig Speicher verfügen, wählen Sie besser eine Farbtiefe von 8 Bit (8 bpp), aber im allgemeinen sollten Sie mindestens 16 Bit zum vernünftigen Arbeiten mit X auswählen.
Unter „Other“ verbergen sich einige momentan weniger wichtige Einstellungen, die wir hier nur kurz beschreiben wollen:
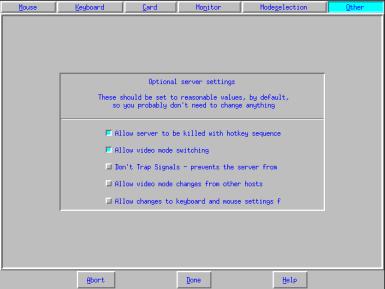
Allow server to be killed with hotkey sequence (Ctrl-Alt-Backspace)
Hier können Sie das Beenden des X-Servers mit dieser Tastenkombination unterbinden.
Allow video mode switching
Wenn Sie unter „Modeselection“ verschiedene Auflösungen gleichzeitig gewählt haben, können Sie während des Betriebes zwischen diesen mit der Tastenkombination STRG+ALT sowie + oder - auf dem Zehnerblock der Tastatur umschalten. Sie können diese Funktion hier ausschalten.
Don't Trap Signals - prevents the server from exiting cleanly
Wenn diese Option nicht aktiviert ist, kann der X-Server Signale wie zum Beispiel SIGTERM abfangen.
Allow video mode changes from other hosts
Erlaubt Änderungen der Bildschirmauflösung während der Laufzeit des Servers auch von anderen Rechnern aus.
Allow changes to keyboard and mouse settings from other hosts
Erlaubt die Änderung von Tastatur und Mauseinstellungen von anderen Rechnern aus.
Wählen Sie nun die Schaltfläche „Done“ und bestätigen Sie die nächste Mitteilung mit „OK“. Es wird nun versucht, den X-Server mit den eingestellten Parametern zu starten. Sollte dies fehlschlagen, d. h. der Server kann gar nicht gestartet werden, versuchen Sie es noch einmal mit der Konfiguration. Stellen Sie dann aber nicht zu hohe Werte ein und achten Sie darauf, daß Sie auch den benötigten X-Server installiert haben. Ein fehlender X-Server macht sich durch eine solche Zeile: couldn't execute "usr/X11R6/bin/XF86_SVGA" no such file or directory bemerkbar. In diesem Fall installieren Sie das benötigte Paket.
Zur Auswahl stehen Ihnen folgende X-Server (XFree 3.3.5):
xserver-3dlabs
xserver-8514
xserver-agx
xserver-common
xserver-fbdev
xserver-ggi
xserver-i128
xserver-mach32
xserver-mach64
xserver-mach8
xserver-mono
xserver-p9000
xserver-s3v
xserver-s3
xserver-svga
xserver-vga16
xserver-w32
Wenn der X-Server gestartet wird, können Sie die Konfigurationsdatei abspeichern. Unter Debian GNU/Linux finden Sie die Datei XF86Config unter /etc/X11/.
Normalerweise wird der X-Server in der niedrigsten Auflösung, die in der Konfigurationsdatei eingetragen ist, gestartet. Wenn Sie dies ändern wollen, um nicht immer von Hand umschalten zu müssen, können Sie die nicht benötigten Einträge aus der Konfigurationsdatei löschen oder den gewünschten Eintrag als ersten in die Teile mit den Auflösungen eintragen.
Suchen Sie hierzu in der Datei /etc/X11/XF86Config nach einem Eintrag in der Form:
Section "Screen" Driver "SVGA" |
   SubSection "Display"
      Depth        16
      Modes        "1600x1200" "800x600" "1280x1024"
      ViewPort     0 0
EndSubSection |
Wenn Sie mit der Konfiguration von X über das Programm XF86Setup keinen Erfolg hatten, probieren Sie es mit dem Programm xf86config.
xf86config
Dieses zweite, textorientierte, Programm erlaubt es Ihnen ebenfalls, eine Konfigurationsdatei für XFree86 zu erstellen. Auch dieses Programm müssen Sie als Superuser (root) starten.
linux:~# xf86config This program will create a basic XF86Config file, based on menu selections you make. In the Debian system, the XF86Config file resides in /etc/X11. A sample XF86Config file is supplied in the directory /usr/share/doc/xserver-common/examples; it is configured for a standard VGA card and monitor with 640x480 resolution. This program will ask for a pathname when it is ready to write the file. You can either take the sample XF86Config as a base and edit it for your configuration, or let this program produce a base XF86Config file for your configuration and fine-tune it. Refer to the file /usr/share/doc/xserver-common/README.Config.gz for a detailed overview of the configuration process. For accelerated servers (including accelerated drivers in the SVGA server), there are many chipset and card-specific options and settings. This program does not know about these. On some configurations some of these settings must be specified. Refer to the server manual pages and chipset-specific READMEs. Before continuing with this program, make sure you know the chipset and amount of video memory on your video card. The SuperProbe program can help with this. It is also helpful if you know what server you want to run. Press enter to continue, or CTRL-C to abort. |
Zunächst müssen Sie die angeschlossene Maus bestimmen.
First specify a mouse protocol type. Choose one from the following list: 1. Microsoft compatible (2-button protocol) 2. Mouse Systems (3-button protocol) 3. Bus Mouse 4. PS/2 Mouse 5. Logitech Mouse (serial, old type, Logitech protocol) 6. Logitech MouseMan (Microsoft compatible) 7. MM Series 8. MM HitTablet 9. Microsoft IntelliMouse 10. Acecad tablet If you have a two-button mouse, it is most likely of type 1, and if you have a three-button mouse, it can probably support both protocol 1 and 2. There are two main varieties of the latter type: mice with a switch to select the protocol, and mice that default to 1 and require a button to be held at boot-time to select protocol 2. Some mice can be convinced to do 2 by sending a special sequence to the serial port (see the ClearDTR/ClearRTS options). If you have a PS/2 mouse, you should use type 4 regardless of how many buttons it has. Enter a protocol number: 4 If your mouse has only two buttons, it is recommended that you enable Emulate3Buttons. Please answer the following question with either 'y' or 'n'. Do you want to enable Emulate3Buttons? n Now give the full device name that the mouse is connected to, for example /dev/tty00. Just pressing enter will use the default, /dev/mouse. Mouse device: /dev/psaux |
Am weitesten verbreitet sind Mäuse mit PS/2-Anschluß, für diese ist in jedem Fall der Typ 4 zu wählen, unabhängig davon, wie viele Tasten die Maus tatsächlich hat. Serielle Mäuse werden je nach Anzahl der Tasten über den Typ 1 oder 2 aktiviert.
Die zweite Frage sollten Sie mit „y“ beantworten, wenn Ihre Maus nur über zwei Tasten verfügt. Sie können dann die dritte Maustaste durch gleichzeitiges Drücken beider Tasten simulieren. Bei einer Dreitastenmaus können Sie die Frage mit „n“ beantworten.
Die nächste Frage bezieht sich auf den Anschluß der Maus. Wenn Sie bereits einen Link /dev/mouse auf das entsprechende Device angelegt haben, können Sie an dieser Stelle einfach die Eingabetaste drücken. Bei einer Maus am PS/2-Anschluß lautet das passende Device: /dev/psaux, serielle Mäuse werden über /dev/ttyS0 oder /dev/ttyS1 angesprochen.
Beginning with XFree86 3.1.2D, the X server uses the new X11R6.1 XKEYBOARD extension to manage the keyboard layout. This requires you to answer a number of questions to add certain entries to the XF86Config file. The following dialogue will allow you to select from a list of already preconfigured keymaps. If you don't find a suitable keymap in the list, the program will try to combine a keymap from additional information you are asked then. Such a keymap is by default untested and may require manual tuning. Please report success or required changes for such a keymap to XFREE86@XFREE86.ORG for addition to the list of preconfigured keymaps in the future. Press enter to continue, or CTRL-C to abort. |
List of preconfigured keymaps: 1 Standard 101-key, US encoding 2 Microsoft Natural, US encoding 3 KeyTronic FlexPro, US encoding 4 Standard 101-key, US encoding with ISO9995-3 extensions 5 Standard 101-key, German encoding 6 Standard 101-key, French encoding 7 Standard 101-key, Thai encoding 8 Standard 101-key, Swiss/German encoding 9 Standard 101-key, Swiss/French encoding 10 Standard 101-key, US international 11 Brazilian ABNT2 12 None of the above Enter a number to choose the keymap. 5 |
Now we want to set the specifications of the monitor. The two critical parameters are the vertical refresh rate, which is the rate at which the the whole screen is refreshed, and most importantly the horizontal sync rate, which is the rate at which scanlines are displayed. The valid range for horizontal sync and vertical sync should be documented in the manual of your monitor. If in doubt, check the monitor database /usr/share/doc/xserver-common/Monitors.gz to see if your monitor is there. Press enter to continue, or CTRL-C to abort. |
You must indicate the horizontal sync range of your monitor.  You can either
select one of the predefined ranges below that correspond to industry-
standard monitor types, or give a specific range.

It is VERY IMPORTANT that you do not specify a monitor type with a horizontal
sync range that is beyond the capabilities of your monitor.  If in doubt,
choose a conservative setting.

    hsync in kHz; monitor type with characteristic modes
 1  31.5; Standard VGA, 640x480 @ 60 Hz
 2  31.5 - 35.1; Super VGA, 800x600 @ 56 Hz
 3  31.5, 35.5; 8514 Compatible, 1024x768 @ 87 Hz interlaced (no 800x600)
 4  31.5, 35.15, 35.5; Super VGA, 1024x768 @ 87 Hz interlaced, 800x600 @ 56 Hz
 5  31.5 - 37.9; Extended Super VGA, 800x600 @ 60 Hz, 640x480 @ 72 Hz
 6  31.5 - 48.5; Non-Interlaced SVGA, 1024x768 @ 60 Hz, 800x600 @ 72 Hz
 7  31.5 - 57.0; High Frequency SVGA, 1024x768 @ 70 Hz
 8  31.5 - 64.3; Monitor that can do 1280x1024 @ 60 Hz
 9  31.5 - 82.0; Monitor that can do 1280x1024 @ 76 Hz
10  31.5 - 95.0; Monitor that can do 1280x1024 @ 85 Hz
11  Enter your own horizontal sync range

Enter your choice (1-11): 9

You must indicate the vertical sync range of your monitor.  You can either
select one of the predefined ranges below that correspond to industry-
standard monitor types, or give a specific range.  For interlaced modes,
the number that counts is the high one (e.g. 87 Hz rather than 43 Hz).

 1  50-70
 2  50-90
 3  50-100
 4  40-150
 5  Enter your own vertical sync range

Enter your choice: 4

You must now enter a few identification/description strings, namely an
identifier, a vendor name, and a model name.  Just pressing enter will fill
in default names.

The strings are free-form, spaces are allowed.
Enter an identifier for your monitor definition: monitor
Enter the vendor name of your monitor: no-name
Enter the model name of your monitor: nichts
|
Im nächsten Schritt wählen Sie einen der vorgegebenen Werte für die vertikale Frequenz aus, oder geben Sie die genauen Werte über die Auswahl „5“ ein.
Danach können Sie beliebige Angaben zur Definition Ihres Monitors in der Konfigurationsdatei machen.
Now we must configure video card specific settings. At this point you can choose to make a selection out of a database of video card definitions. Because there can be variation in Ramdacs and clock generators even between cards of the same model, it is not sensible to blindly copy the settings (e.g. a Device section). For this reason, after you make a selection, you will still be asked about the components of the card, with the settings from the chosen database entry presented as a strong hint. The database entries include information about the chipset, what server to run, the Ramdac and ClockChip, and comments that will be included in the Device section. However, a lot of definitions only hint about what server to run (based on the chipset the card uses) and are untested. If you can't find your card in the database, there's nothing to worry about. You should only choose a database entry that is exactly the same model as your card; choosing one that looks similar is just a bad idea (e.g. a GemStone Snail 64 may be as different from a GemStone Snail 64+ in terms of hardware as can be). Do you want to look at the card database? y |
0 2 the Max MAXColor S3 Trio64V+ S3 Trio64V+ 1 3DLabs Oxygen GMX PERMEDIA 2 2 3DVision-i740 AGP Intel 740 3 3Dlabs Permedia2 (generic) PERMEDIA 2 4 928Movie S3 928 5 ABIT G740 8MB SDRAM Intel 740 6 AGP 2D/3D V. 1N, AGP-740D Intel 740 7 AGX (generic) AGX-014/15/16 8 ALG-5434(E) CL-GD5434 9 AOpen AGP 2X 3D Navigator PA740 Intel 740 10 AOpen PA2010 Voodoo Banshee 11 AOpen PA45 SiS6326 12 AOpen PA50D SiS6326 13 AOpen PA50E SiS6326 14 AOpen PA50V SiS6326 15 AOpen PA80/DVD SiS6326 16 AOpen PG128 S3 Trio3D 17 AOpen PG975 3dimage975 Enter a number to choose the corresponding card definition. Press enter for the next page, q to continue configuration. |
Sie bekommen nun die erste Seite der Datenbank angezeigt. Die Liste ist alphabetisch, aufsteigend sortiert. Sie können mit der Taste RETURN weiterblättern. Wenn Sie die passende Grafikkarte gefunden haben, geben Sie die Zahl ein, die Sie in der entsprechenden Zeile am linken Bildschirmrand sehen.
414 Matrox Millennium G200 SD 4MB mgag200 415 Matrox Millennium G200 SD 8MB mgag200 416 Matrox Millennium G400 16MB mgag400 417 Matrox Millennium G400 32MB mgag400 418 Matrox Millennium II 16MB mga2164w 419 Matrox Millennium II 4MB mga2164w 420 Matrox Millennium II 8MB mga2164w 421 Matrox Mystique mga1064sg 422 Matrox Mystique G200 16MB mgag200 423 Matrox Mystique G200 4MB mgag200 424 Matrox Mystique G200 8MB mgag200 425 Matrox Productiva G100 4MB mgag100 426 Matrox Productiva G100 8MB mgag100 427 MediaGX mediagx 428 MediaVision Proaxcel 128 ET6000 429 Mirage Z-128 ET6000 430 Miro CRYSTAL VRX Verite 1000 431 Miro Crystal 10SD with GenDAC S3 801/805 Enter a number to choose the corresponding card definition. Press enter for the next page, q to continue configuration. 417 Your selected card definition: Identifier: Matrox Millennium G400 32MB Chipset: mgag400 Server: XF86_SVGA Do NOT probe clocks or use any Clocks line. Press enter to continue, or CTRL-C to abort. |
Nach der Auswahl der Karte wird das verwendete Chipset sowie der benötigte X-Server angezeigt. Beachten Sie, daß Sie genau diesen X-Server auch als Debian-Paket installieren müssen, der Ihrer Karte entspricht. Wichtig ist auch die nächste Zeile, hier finden Sie für diese Karte den Hinweis, daß es nicht nötig ist, weitere Angaben zu den Frequenzen der Karte zu machen oder diese automatisch ermitteln zu lassen. Der X-Server kann anhand der bisherigen Angaben alle weiteren Parameter ermitteln.
Now you must determine which server to run. Refer to the manpages and other
documentation.  The following servers are available (they may not all be
installed on your system):

 1  The XF86_Mono server.  This a monochrome server that should work on any
    VGA-compatible card, in 640x480 (more on some SVGA chipsets).
 2  The XF86_VGA16 server.  This is a 16-color VGA server that should work on
    any VGA-compatible card.
 3  The XF86_SVGA server.  This is a 256 color SVGA server that supports
    a number of SVGA chipsets.  On some chipsets it is accelerated or
    supports higher color depths.
 4  The accelerated servers.  These include XF86_S3, XF86_Mach32, XF86_Mach8,
    XF86_8514, XF86_P9000, XF86_AGX, XF86_W32, XF86_Mach64, XF86_I128,
    XF86_S3V, and XF86_3DLabs.

These four server types correspond to the four different "Screen" sections in
XF86Config (vga2, vga16, svga, accel).

 5  Choose the server from the card definition, XF86_SVGA.

Which one of these screen types do you intend to run by default (1-5)? 5


The server to run is selected by changing the first line of the
/etc/X11/Xserver file.  For example, setting it to "/usr/bin/X11/XF86_SVGA"
selects the SVGA server.

Please answer the following question with either 'y' or 'n'.
Do you want this program to modify the /etc/X11/Xserver file? y
|
Die nächste Frage sollten Sie auf alle Fälle mit „y“ beantworten, das Konfigurationsprogramm wird dann die Datei /etc/X11/Xserver entsprechend Ihrer Auswahl modifizieren, so daß der passende X-Server gestartet werden kann.
Now you must give information about your video card. This will be used for the "Device" section of your video card in XF86Config. You must indicate how much video memory you have. It is probably a good idea to use the same approximate amount as that detected by the server you intend to use. If you encounter problems that are due to the used server not supporting the amount memory you have (e.g. ATI Mach64 is limited to 1024K with the SVGA server), specify the maximum amount supported by the server. How much video memory do you have on your video card: 1 256K 2 512K 3 1024K 4 2048K 5 4096K 6 Other Enter your choice: You must now enter a few identification/description strings, namely an identifier, a vendor name, and a model name. Just pressing enter will fill in default names (possibly from a card definition). Your card definition is Matrox Millennium G400 32MB. The strings are free-form, spaces are allowed. Enter an identifier for your video card definition: You can simply press enter here if you have a generic card, or want to describe your card with one string. Enter the vendor name of your video card: Enter the model (board) name of your video card: |
Auch für die Grafikkarten müssen Sie eine ID, den Hersteller und das Modell angeben. Wenn Sie die Karte aus der Datenbank ausgewählt haben, können Sie die Werte mit RETURN einfach übernehmen.
A Clockchip line in the Device section forces the detection of a programmable clock device. With a clockchip enabled, any required clock can be programmed without requiring probing of clocks or a Clocks line. Some cards don't have a programmable clock chip. Choose from the following list: 1 Chrontel 8391 ch8391 2 ICD2061A and compatibles (ICS9161A, DCS2824) icd2061a 3 ICS2595 ics2595 4 ICS5342 (similar to SDAC, but not completely compatible) ics5342 5 ICS5341 ics5341 6 S3 GenDAC (86C708) and ICS5300 (autodetected) s3gendac 7 S3 SDAC (86C716) s3_sdac 8 STG 1703 (autodetected) stg1703 9 Sierra SC11412 sc11412 10 TI 3025 (autodetected) ti3025 11 TI 3026 (autodetected) ti3026 12 IBM RGB 51x/52x (autodetected) ibm_rgb5xx Just press enter if you don't want a Clockchip setting. What Clockchip setting do you want (1-12)? |
Bei einigen Karten ist es notwendig, explizit den verwendeten Clockchip anzugeben, Sie können dies im allgemeinen aber mit RETURN übergehen und dem X-Server überlassen.
For most modern configurations, a Clocks line is neither required or desirable. However for some older hardware it can be useful since it prevents the slow and nasty sounding clock probing at server start-up. Probed clocks are displayed at server startup, along with other server and hardware configuration info. You can save this information in a file by running 'X -probeonly 2>output_file'. Be warned that clock probing is inherently imprecise; some clocks may be slightly too high (varies per run). At this point X -probeonly can be run, and, if possible, clock information extracted from the output. It is recommended that you do this yourself and if a set of clocks is shown then you add a clocks line (note that the list of clocks may be split over multiple Clocks lines) to your Device section afterwards. Be aware that a clocks line is not appropriate for most modern hardware that has programmable clocks. You must be root to be able to run X -probeonly now. The card definition says to NOT probe clocks. Do you want me to run 'X -probeonly' now? n |
Zur Ermittlung einiger Werte kann nun der X-Server in einem Testmodus gestartet werden. In unserem Beispiel ist dies nicht notwendig, übergehen Sie diesen Test, indem Sie „n“ eingeben.
For each depth, a list of modes (resolutions) is defined. The default resolution that the server will start-up with will be the first listed mode that can be supported by the monitor and card. Currently it is set to: "640x480" "800x600" "1024x768" "1280x1024" for 8bpp "640x480" "800x600" "1024x768" "1280x1024" for 16bpp "640x480" "800x600" "1024x768" "1280x1024" for 24bpp "640x480" "800x600" "1024x768" for 32bpp Note that 16, 24 and 32bpp are only supported on a few configurations. Modes that cannot be supported due to monitor or clock constraints will be automatically skipped by the server. 1 Change the modes for 8bpp (256 colors) 2 Change the modes for 16bpp (32k/64k colors) 3 Change the modes for 24bpp (24-bit color, packed pixel) 4 Change the modes for 32bpp (24-bit color) 5 The modes are OK, continue. Enter your choice: 5 |
Sie bekommen nun die anhand Ihrer Angaben ermittelten Auflösungen und Farbtiefen angezeigt. Sie sollten diese Werte erst einmal so akzeptieren und später, wenn nötig, verfeinern.
The XF86Config file is about to be written. Ensure you do not accidentally overwrite a previously configured one. Write configuration to /etc/X11/XF86Config? y |
Sie können nun versuchen, den X-Server mit dem Kommando startx zu starten.
anXious
anXious ist ein neues Programm zur Konfiguration des X-Servers und ist Bestandteil des Paketes xviddetect. anXious benutzt das Programm xviddetect, um den benötigten X-Server für die Grafikkarte zu bestimmen, abschließend werden die benötigten Pakete mit apt-get installiert.
Wie bei jedem kommandozeilenbasierten Programm kennt auch anXious die Option --help:
anXious - a X Configuration tool (c) 2000 Randolph Chung; GPLv2

anXious [--skipsetup] [--skipconfig] [--forcesetup] [--forceconfig] [--dodebug]
        [--quiet]
anXious --help
  --skipsetup: skip the setup phase; do not try to install a server
  --skipconfig: skip the config phase; do not try to write a config file
  --forcesetup: override automatic detection of phases; force setup step
  --forceconfig: override automatic detection of phases; force config  step
  --quiet: runs anXious more quietly
  --dodebug: Turns on debugging output
  --help: shows this message

  anXious has a setup stage, where it helps you determine what packages to
  install, and a configuration stage, where it writes out an XF86Config file.
  This program will automatically guess which step is needed based on
  what is available on your system. You can force anXious to start from
  scratch by using the --forcesetup and --forceconfig options.
|
Wie zu sehen ist, können Sie die einzelnen Phasen der Konfiguration überspringen und auch eine neue Konfiguration erstellen, falls schon eine Datei existieren sollte.
Im folgenden wird eine komplette Neukonfiguration beschrieben, wie sie auch bei der Neuinstallation eines Systems automatisch gestartet wird:
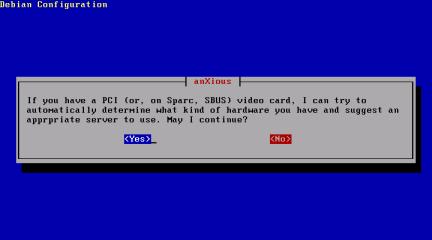
anXious kann das Program xviddetect benutzen, um PCI (oder auf der Sparc-Architektur SBUS) Grafikkarten zu erkennen und so den benötigten X-Server zu bestimmen. Sie können diese Überprüfung aber auch übergehen.
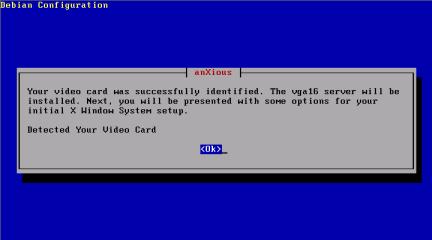
Hier als Beispiel ein automatisch bestimmter X-Server (VGA16). Im folgenden werden Sie durch einige weitere Schritte zur Konfiguration geführt.
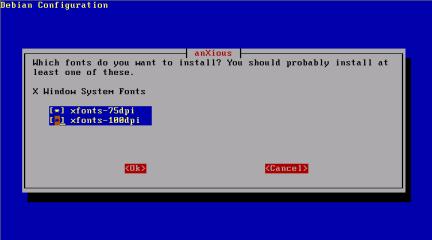
Nachdem die wichtigsten Einstellungen durchgeführt wurden, werden von anXious die benötigten X-Server installiert. Sie können hier auswählen, ob weitere Schriften im gleichen Schritt installiert werden sollen. Auf alle Fälle sollten Sie die 75dpi-Schriften installieren. In einigen Fällen kann es sinnvoll sein, auch die 100dpi-Schriften zu installieren. Hierzu finden Sie später noch weitere Informationen.
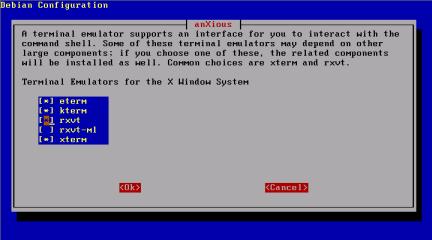
Debian GNU/Linux enthält verschiedene Terminal-Emulatoren, je nachdem welche auf Ihrem Installationsmedium verfügbar sind, können Sie hier nun einige auswählen, die nach der Konfiguration installiert werden. Sie sollten hier in jedem Fall das normale xterm installieren. Alle anderen sind im Funktionsumfang erweitert und im täglichen Betrieb vielleicht sinnvoller, Sie können diese aber später immer noch installieren.
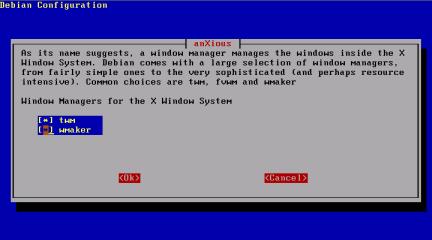
In diesem Schritt können Sie zwischen verschiedenen Windowmanagern wählen. Debian GNU/Linux verfügt über eine ganze Reihe verschiedener Windowmanager, Sie sehen hier nur die momentan, anhand der Paketdateien gefundenen, verfügbaren. Sie können später problemlos weitere Windowmanager installieren.
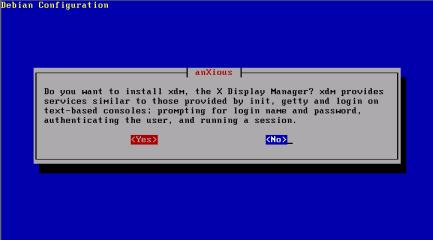
Im nächsten Schritt können Sie das Program xdm installieren lassen. Hiermit können Sie sich unter der grafischen Oberfläche am System anmelden. Falls Sie bei der weiteren Konfiguration Schwierigkeiten haben kann es vorkommen, daß der X-Server nicht lauffähig ist. Somit haben Sie auch keine Möglichkeit sich via xdm anzumelden. An dieser Stelle sollten Sie darauf verzichten xdm zu installieren, um Schwierigkeiten zu vermeiden. Sie können die Installation später noch nachholen oder eine der Alternativen zu xdm, auf die später noch eingegangen wird, benutzen.
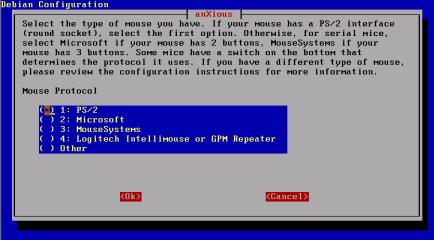
Im nächsten Schritt wählen Sie den Maustyp aus. Aktuelle Rechner verfügen meist über eine Maus mit PS/2-Anschluß. Wenn Sie im Textmodus das Programm gpm benutzen, sollten Sie hier den Punkt 4, „GPM Repeater“ auswählen. Die Auswahl „Other“ ist auszuwählen, wenn kein passendes Modell in der Liste zu finden ist, zum Beispiel wenn Sie eine USB-Maus einsetzen. Sie müssen dann später noch von Hand die entsprechende Änderung in der Konfigurationsdatei vornehmen.
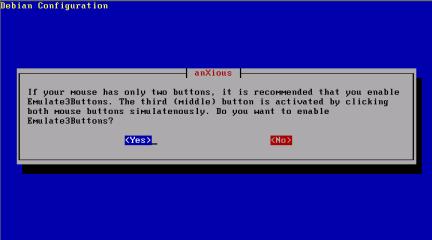
Wenn Sie eine Maus mit nur zwei Tasten einsetzen, können Sie hier die Emulation der dritten Taste (durch gleichzeitiges Drücken beider Maustasten) aktivieren.
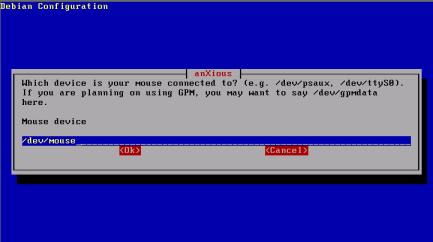
Geben Sie hier das Ihrer Maus entsprechende Device oder einen Link darauf an. Wenn Sie das Programm gpm einsetzen, so geben Sie hier das Device /dev/gpmdata an.
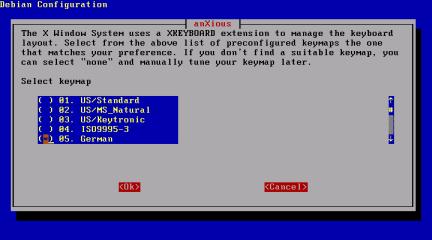
Hier nun die Auswahl der Tastatur, die Liste ist länger als hier angezeigt, Sie können mit den Pfeiltasten durch die Liste wandern.
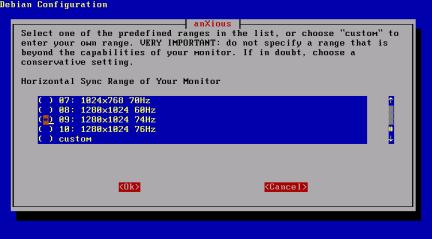
Aus dieser Liste wählen Sie eine Auflösung, mit der Ihr Monitor optimal arbeitet. Wählen Sie in keinem Fall einen zu großen Wert!
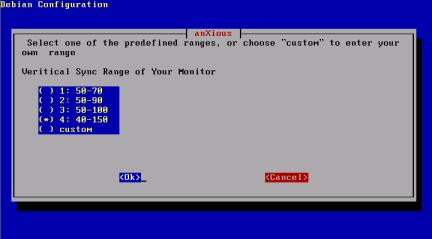
Wählen Sie hier die vertikale Synchronisationsrate Ihres Monitors, Angaben hierzu finden Sie im Handbuch Ihres Monitors.
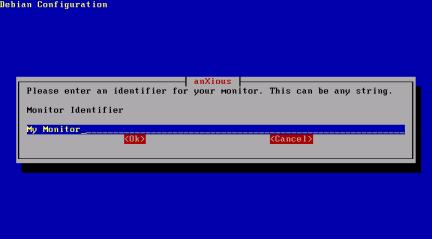
Hier können Sie Ihrem Monitor eine Bezeichung geben, die innerhalb der Konfigurationsdatei verwendet wird.
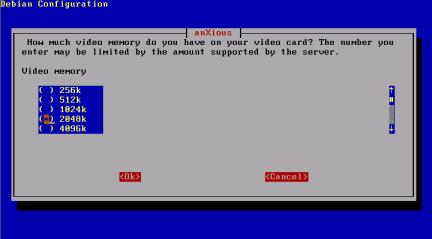
Wählen Sie hier aus, mit wie viel Videospeicher Ihre Grafikkarte bestückt ist.
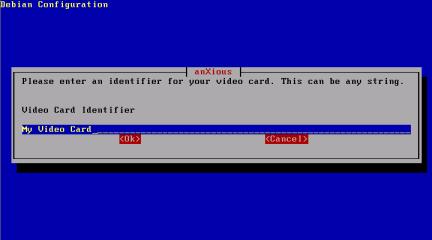
Auch für die Grafikkarte können Sie hier eine Bezeichnung eingeben.
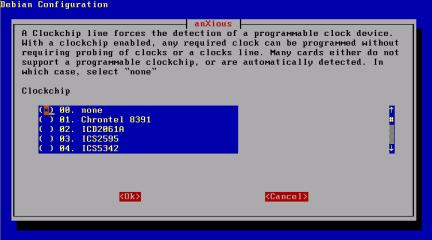
Hier können Sie wählen, welcher Clockchip sich auf der Grafikkarte befindet. Meist kann dieser automatisch bestimmt werden, so daß hier „none“ gewählt werden kann.
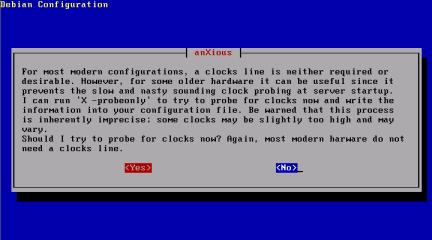
Sie können nun ermitteln lassen, welche Frequenzen von der Grafikkarte unterstützt werden. Bei neueren Karten ist dies nicht notwendig.
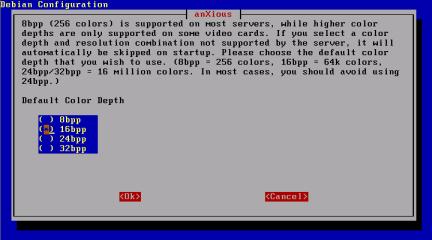
Wählen Sie hier die gewünschte Farbtiefe aus. Für die ersten Versuche sind 256 Farben (8bpp) ausreichend, später können Sie diesen Wert erhöhen.
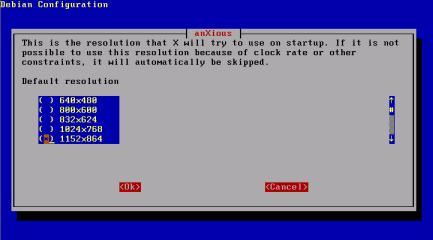
Stellen Sie hier die gewünschte Auflösung ein, mit der der X-Server starten soll.
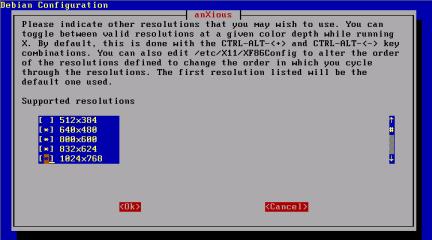
Hier können Sie mehrere Auflösungen wählen zwischen denen Sie während des Betriebes umschalten können.
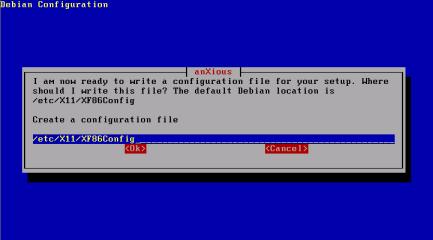
Wenn Sie bereits eine funktionsfähige Konfiguration erstellt haben, können Sie die neue Konfiguration an einem anderen Ort speichern.
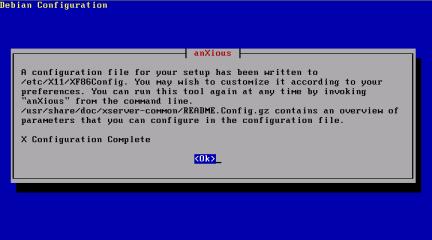
Hiermit ist die Konfiguration abgeschlossen.